InDesign is one of the most important tools for various design-related occupational uses. Whether it be magazines, brochures, packaging, posters or flyers, or you would like to create more corporate documents, such as importing graphical and table data, or creating documents and forms for PDF print.
The program is also heavily used for text documents such as Kindle books and for creating readable file formats to keep up-to-date with the ever-growing digital environment.
InDesign and other Adobe programs use similar formats and layouts across their products, therefore making things that little bit easier to use if you’re already familiar with other Adobe programs. In this beginner’s guide, we’ll mostly be looking at the tools that make up the program and what they may be used for.
If you have never used any Adobe programs, or are simply dabbling in the world of symbols, paths, graphics and text, then this basic tutorial is right for you. However, Adobe products, when you’re unaccustomed to them can be highly confusing for the novice, so it pays to take a short course with a firm like Creative Studios Derby to help you to really get to grips with the software.
First InDesign Steps – Opening up a Document
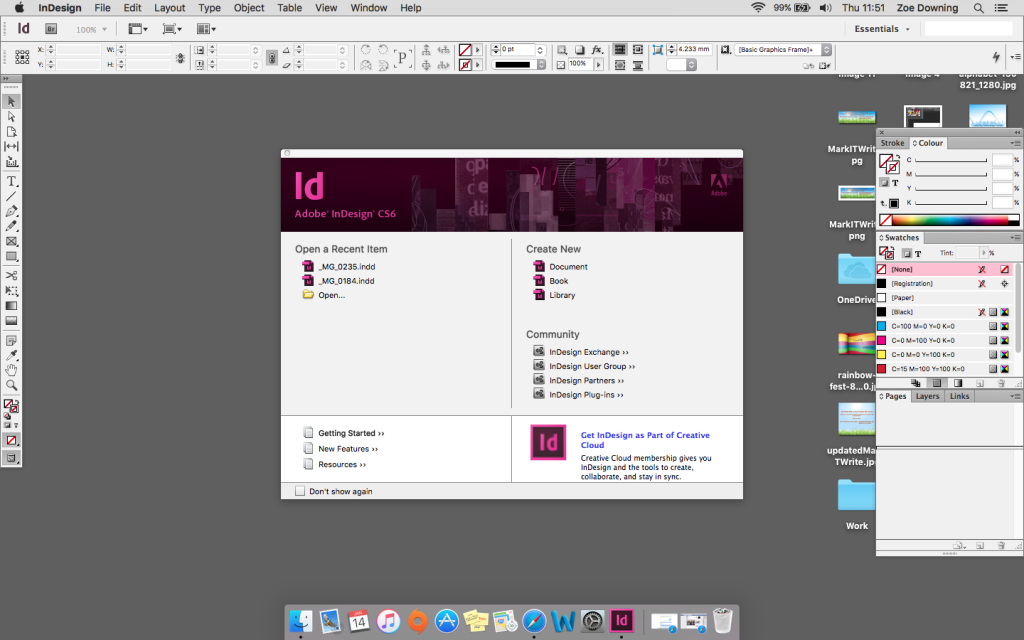
When first launching Adobe InDesign, a task box will appear. This is where you select the output of your document. For the purposes of this tutorial I chose the top option on the right hand side Document.
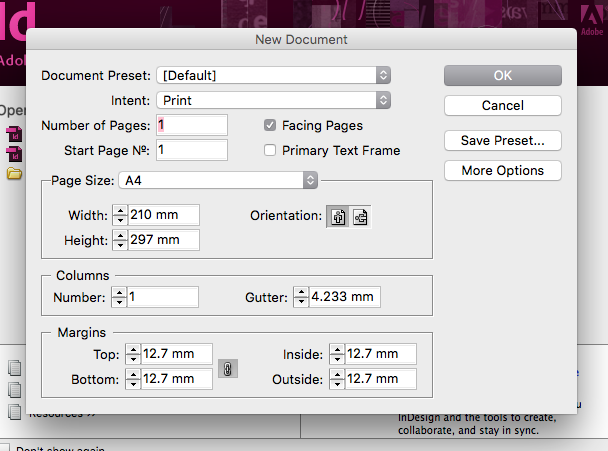
Another task box will pop up on the screen after you click Document. This is to choose your document settings.
You can choose the width, height, marginal spacing, orientation, guttering and columns and intent of the document.
For now, simply select OK.
The document will now open. This is your work space. On the left hand side of the window there is a long tab running vertically down the window presenting all the available tools for you to use.
First, we need to know what tools are what and how we’re going to use them. We also need to know where we need to find things within the window, such as colours, text, pages etc.
Establishing the Panels, Tools and Options Bars
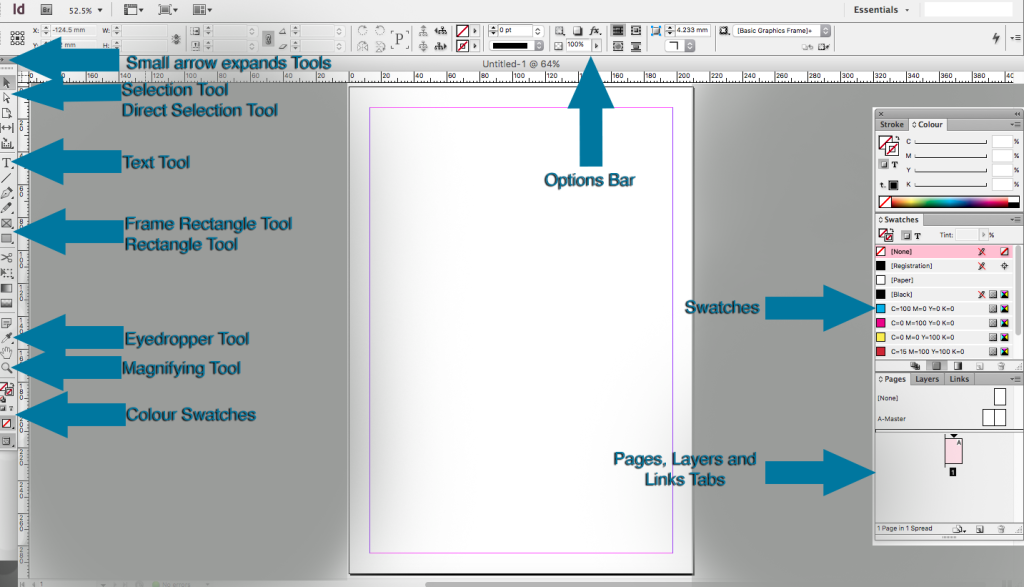
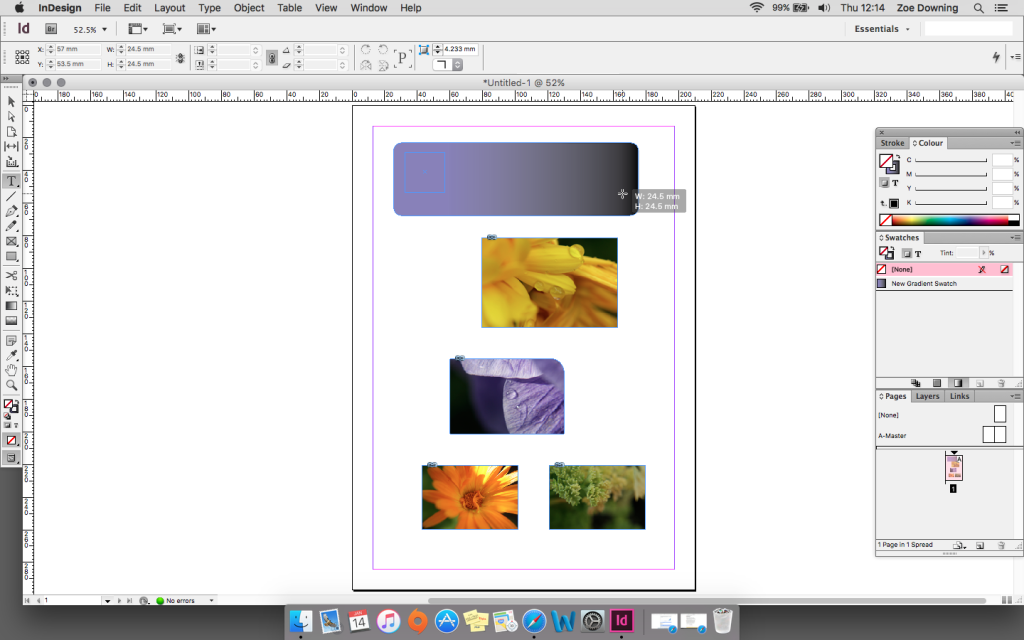
This is your working layout. I have annotated the key tools that are essential when using InDesign.
Selection Tools
At the top of the Tools Panel, running down the left hand side of the window, you have the Selection Tool and just underneath that is the Direct Selection Tool. The Selection Tool is simply for moving images, graphics, vectors, etc around the page. The Direct Selection tool is intended to click on a specific area of an image or box.
Text Tool
Next you have your text tool. With this tool, it is important to note that when typing on the page you will need to draw the text box initially. Just drag the box to where you want on the page and start typing.
The options bar located at the top of the window will adapt according to the tool that is selected. The image above shows the Text Tools in the options bar.
Here you can modify the size, font, type spacing, colour etc.
Rectangle Frame and Rectangle Tool
The Rectangle Frame Tool can be used for placing images, graphics, graphs and tables etc.
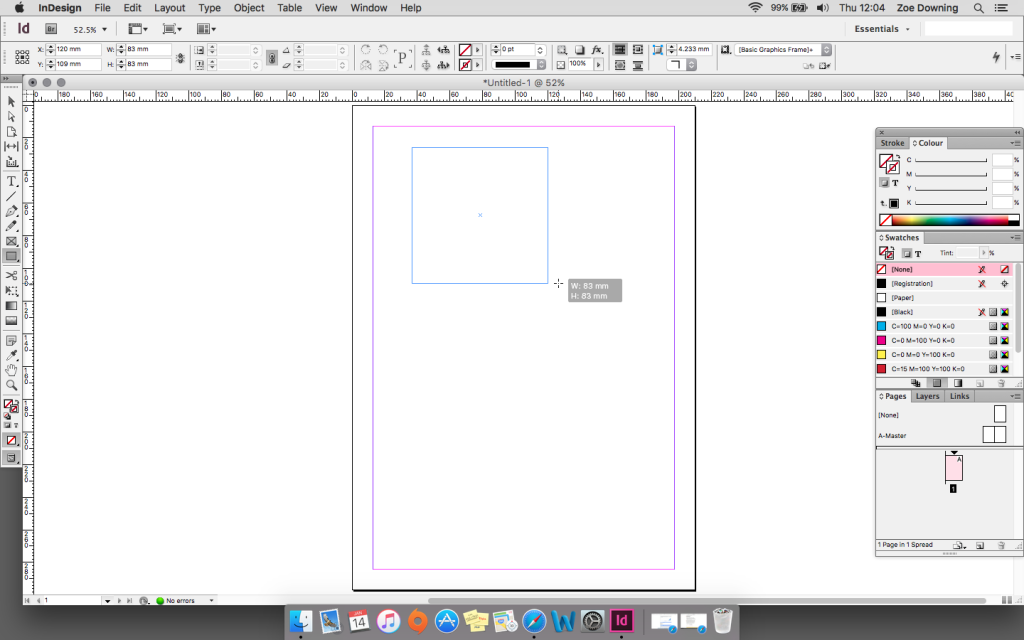
When it comes to the time when you’re working confidently with the software, you will simply draw on the page where you want your first frame to appear. Next you’ll go to the top of the window and click File – Place.
Notice your cursor has now changed to a brush with the chosen image shown in low opacity whilst you’re practicing.
By clicking in the frame box the image will be placed at the original size, to alter this, simply click the circle located in the middle of the Frame, the sizers will now change to orange, this indicates that the image is selected rather than the frame.
You can now resize the image within the frame.
A quicker way to place an image in the box, is to navigate again to the top of the window, clicking Object – Fitting – Fit Frame Proportionally, this is also achieved by right clicking in the box and clicking Fitting and Fit Frame Proportionally.
This will automatically fill the Frame with the chosen image.
You can also use the keyboard command, Command D (Mac) or Control D (Windows).
If you want your image/frame to have rounded corners, simply click the Yellow symbol on the frame box when selected. You can then drag around the outline of the box to create curved corners. To edit just one corner, hold down shift while dragging.
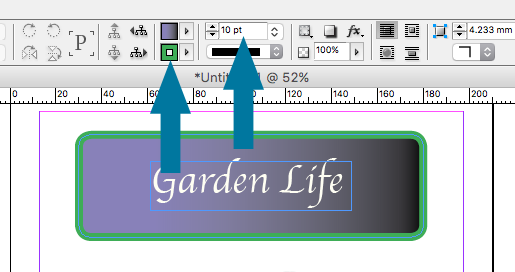
You can add borders to the frame. Go to the options panel and select the Stroke box, here you can modify the colour for the stroke or in normal terms, the border.
Click the arrow on the right hand side of the box containing 1pt. This will change the width of the border. You can make this larger or you can type opt for no border at all by creating a null value.
If you find the many frames you have created are overlapping and hard to select specifically, hold down the Command key or Control (Windows), this will allow a frame inside another frame to be selected.
Eyedropper Tool
When creating text or borders of a specific matching colour to an element in the document, bringing the Eyedropper Tool into play makes this a much simpler task.
Simply click the Eyedropper tool from the tools panel and hover over the colour you intend to use. Click the colour and notice the colour swatch at the bottom of the tools panel change to that colour. When an element in the document is selected, e.g., text, it will automatically change to the desired colour chosen with the Eyedropper tool.
On the right hand side of the window, notice the swatches panel. By clicking the small arrow on the right hand side of the swatches tab, you can create new swatches that will remain saved for that document.
Magnifying Tool
To use this tool, simply click on the document; this will zoom in at a set amount of pixels. To zoom more freely, simply drag the magnifying tool and a box will appear across the document, this tells you how much will be magnified.
Hold down the ALT key to zoom out.
Layout
The annotated image (top) shows the area outside the page greyed out. This is the pasteboard, clicking in this area will deselect everything on the page.
The pink line shown around the page is the margins, stay within this line in order to avoid trimming.
The green lines that appear when moving elements such as images, shows whether the image is inline with another element. A pink line will appear within the middle of the page when moving an element to the middle to address whether the image is centered.
These tools will help to guide you when creating a document and keeps your elements in proportion.
When working with JPEGs, bear in mind pixilation when blowing images up above their original size.
Start to organise images around the page and familiarise yourself with the tools and working space. It takes some getting used to. However, once you have got to grips with it, it can be a very useful, powerful and innovative program.
There’s little doubt that InDesign is a powerful program, as are all of the Adobe family. But make no mistake, it’s has a specific purpose and that is to create printed material. These can be anything from your brochures to your flyers, but you should know when to use this and when to use another Adobe program which is more suited to your task.
It’s easier to carry out some tasks in InDesign than it would be in Illustrator, such as text wrapping and layout and you may want to create all of your PDFs using it. If you’re sending designs that you have created yourself to the printers, then it’s really important to know what format and files you should send. Combining InDesign with other Adobe file formats can create large files that your printer won’t be happy with.
For the most part, it’s wise to use a design professional whilst you’re learning to use InDesign or Adobe products in general. Once you know, you can and will save on design costs, but do make sure that you take a respected course and learn how to do it properly. We all love YouTube, but there’s little that can replace workshops and one-to-one tuition.
Do you think your business would benefit from learning how to use Adobe CC software? We know it would! We’ve helped hundreds of companies just like yours slash design costs and increase employee skillsets. Why not give us a call on 01332 986924 to discuss your options for learning onsite or even online with our highly skilled learning professionals.
We look forward to hearing from you!

 Click here to see all of our Software Training Courses


2 thoughts on “Getting Started with Adobe InDesign”