
 Click here to see all of our Software Training Courses
Creating Complex Clipping Paths in Adobe Photoshop
Compound paths
In my previous tutorials I have shown how to draw a clipping path around the outside of an image to make a really accurate selection. This is fine until you get a more complex photograph in Adobe Photoshop and you want to cut holes out of the image too, this is when we want to create a Compound Path.
This is a more advanced Adobe Photoshop tutorial and I have assumed some prior knowledge of using the Pen Tool and creating Paths in the Paths panel. You may want to read some of my previous posts to get up to speed with these tools so you can follow through with this tutorial. Here is a good starting point with a post explaining Photoshop Paths and Pixels.
The way we do this is to combine a number of Adobe Photoshop paths in to one and create a Compound Path within the Paths panel of the Photoshop interface.
Here is how we go about it…
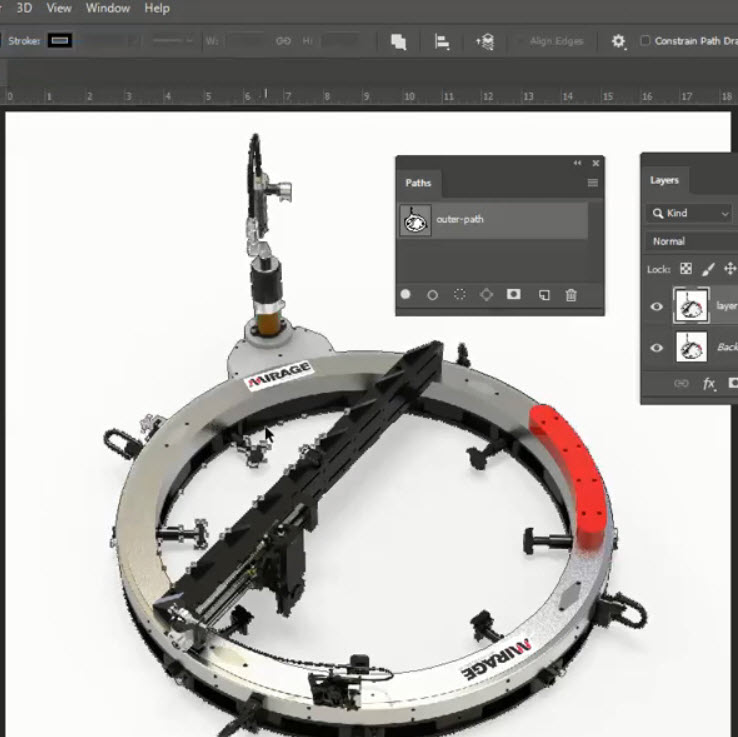
Draw The Paths
First of all I am going to draw all of the relevant paths with the pen tool (as paths not shapes), don’t worry about combining them yet they can all be separate.
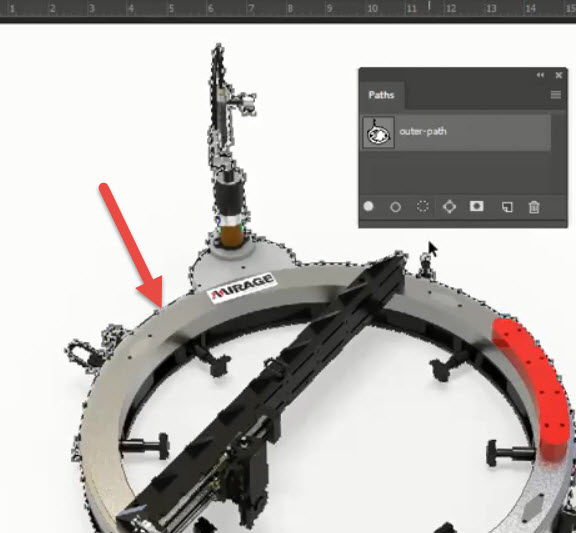
Once you have all the paths within the Adobe Photoshop Paths panel you need to copy and paste them all in to the same path within the panel like the above screenshot.
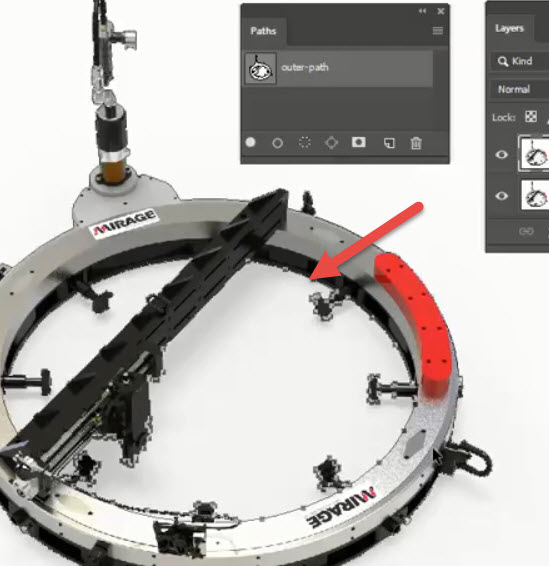
Making the selection
If we now click on the small circle at the bottom of the Adobe Paths Panel to make the selection you will see that it only makes the selection of the outside path. Obviously this is not what we want to happen because when we copy this in to a new layer there will be no holes through the image where we want them to be.
Subtracting the inside paths
Now choose you black path selection tool and click on one of the inside paths that have been created.
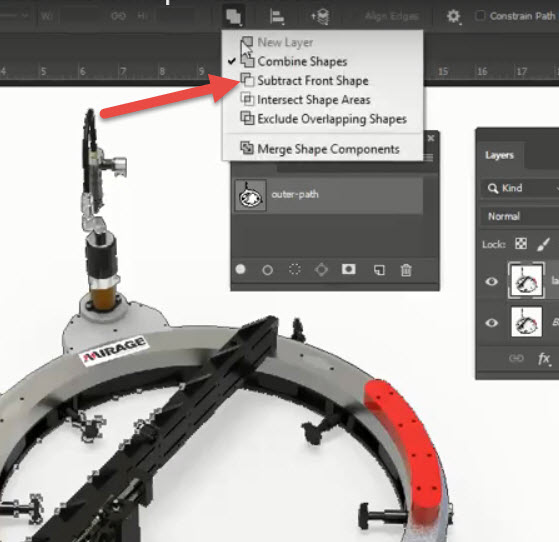
With the path selected go to the control bar at the top of your Adobe Photoshop interface and click on the small drop down option to select ‘Subtract Front Shape’.
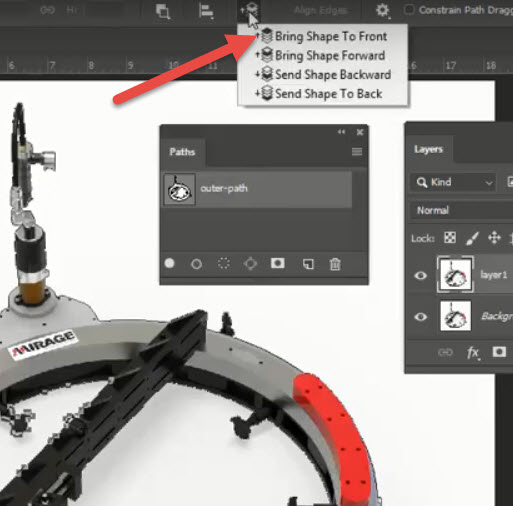
Then with the same path selected move across to the next option and choose ‘Bring Shape To Front’.
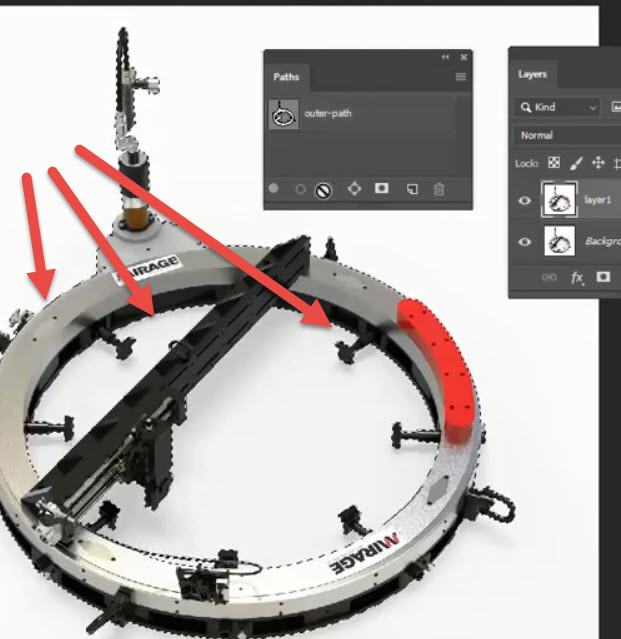
Now when we click on the button at the bottom of the Adobe photoshop Paths panel to make a selection of our paths you will see that all the paths are selected rather than just the outside path.
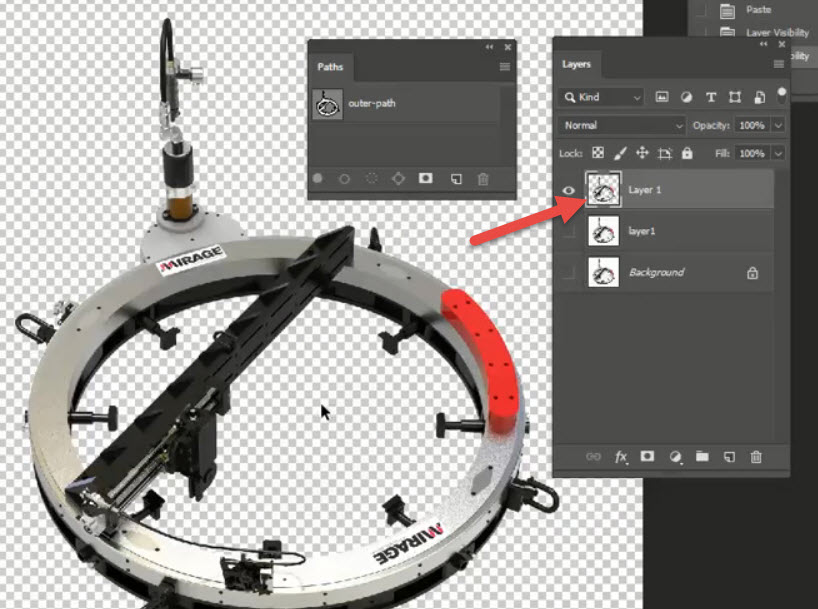
With the selection made you can just go to Copy and Paste then you should have your perfectly cut out image on its new layer!
To keep the transparency when saving from Adobe Photoshop you will need to save the file as either a Photoshop file (,PSD) or if you are uploading to the web or sending to someone who does not have Adobe Photoshop you can save it as a PNG and make sure to tick the box ‘Preserve Transparency’
Are you looking to learn about more about the Adobe Creative Cloud Applications?
At Creative studios in Derby we have a number of Adobe Training Courses for all levels of ability and need. We regularly run Adobe training courses in Adobe InDesign, Adobe Illustrator, Adobe Photoshop and Adobe After Effects to name a few.
If you are interested in getting up to speed with any of the Adobe Creative Cloud Applications check out our upcoming courses, or if you would like to have a quotation from us to come to you and train in your own offices just fill out the form below and we will get back to you with more information and a no obligation quotation.