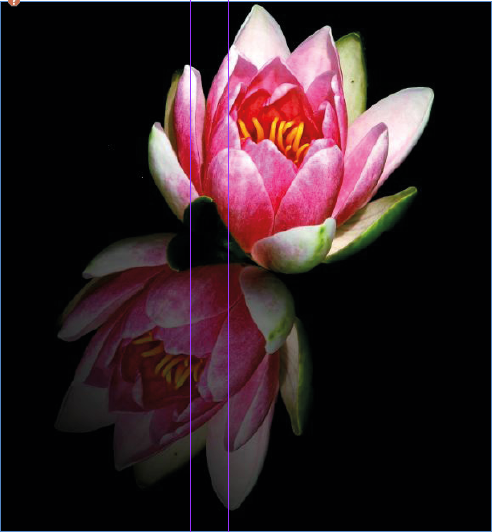
The shiny table or reflection effect can be found on countless modern professional-looking ads and websites. Digital artists use this effect in adobe Photoshop to make objects and text appear as if they are sitting on a very shiny, reflective table.
Adding reflections to objects in Adobe Photoshop can instantly transform your designs from looking ordinary or out-of-place to polished and visually interesting.
This guide will show you how to use Adobe Photoshop cut an object out of a photograph and make it appear as if it is sitting on a reflective surface. You can use this technique to add reflections to just about anything.
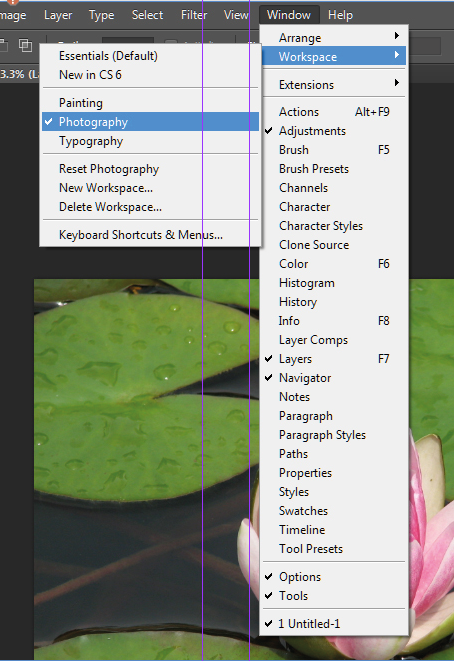
Step 1: Set up your workspace in Adobe Photoshop. Select Window > Workspace > Photography to open all of the windows and tools that you will need for this tutorial. Open the image that you want to add reflections to in Adobe Photoshop and save it under a new name. Make any general lighting, contrast, or color adjustments that you would normally make. When you are finished, right-click the Background layer and select “Flatten Image.”
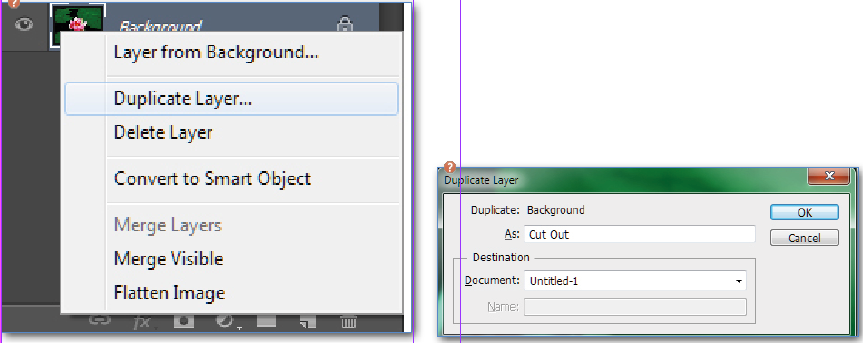
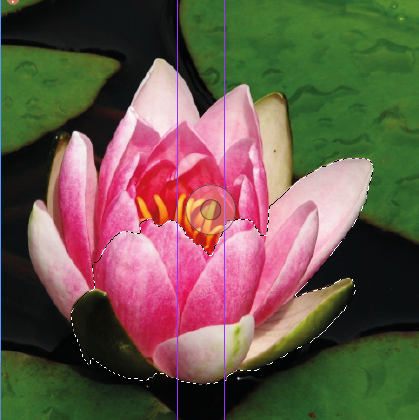
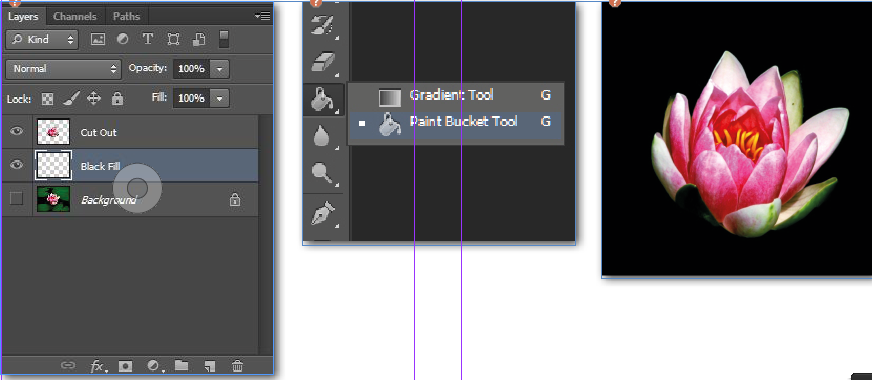
Step 2: Right-click the Adobe Photoshop Background layer and select “Duplicate Layer.” Name the new layer “Cut Out.” Press W to activate Photoshops Quick Selection Tool. In this step, you will select the part of the photo that you want to add a reflection to. Begin by clicking around inside the subject of the photo. Adobe Photoshop will automatically detect the similar areas in the image. Each click will add to the selection. If you make any mistakes, you can Alt-click inside the mistake-area to subtract from the selection.
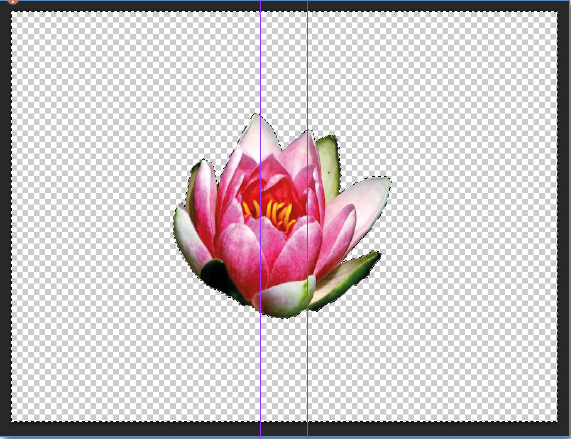
Step 3: When you are happy with your Adobe Photoshop selection, press Ctrl+Shift+I to invert the selection (to select everything outside of the subject). Press the Delete key on your keyboard. Click the little eye icon next to the Background layer to hide it.
Step 4: Click the Background layer, and then create a new layer (press Ctrl + Shift + N) in between the Background layer and the Cut Out layer. Name the new Adobe Photoshop layer “Black Fill.” Make Black the foreground color and White the background color. Press G to activate the Paint Bucket / Gradient Tool. Right-click the icon and make sure the Paint Bucket Tool is selected. Press Ctrl + D to clear the selection, and click anywhere to fill the Black Fill layer with Black.
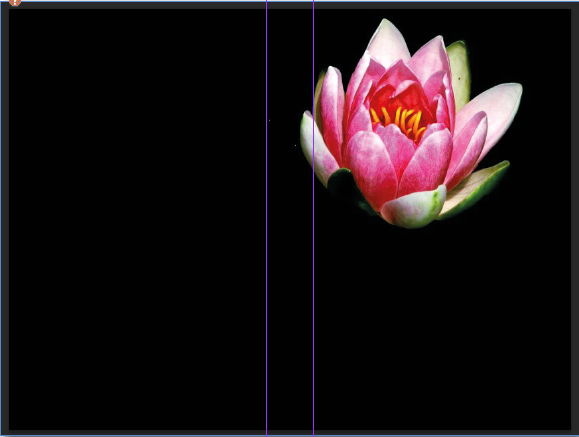
Step 5: Press V to activate the Adobe Photoshop Move Tool, select the Cut Out photoshop layer, and move the subject of your photo into the top half of the document. This will give you more space to create a reflection.
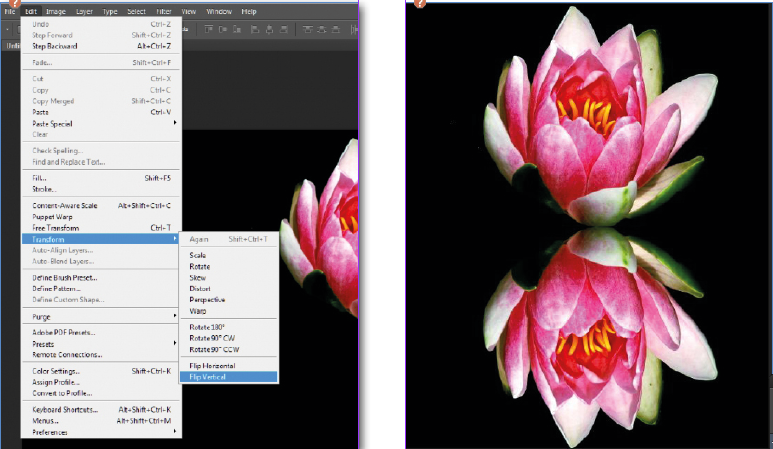
Step 6: Right-click the Cut Out layer, and select Duplicate Layer. Name the new layer “Reflection.” Flip the image by selecting Edit > Transform > Flip Vertical . Press V to activate the Move Tool, and tap the down-arrow key until the bottom of the flipped image is just barely touching the bottom of the original image. You can also click-and-drag while holding shift to move the image downward in a straight line.
If there is not enough room to fit the entire flipped image in the Adobe Photoshop document you can move unflipped image up, or go to Image > Canvas Size to make the document bigger.
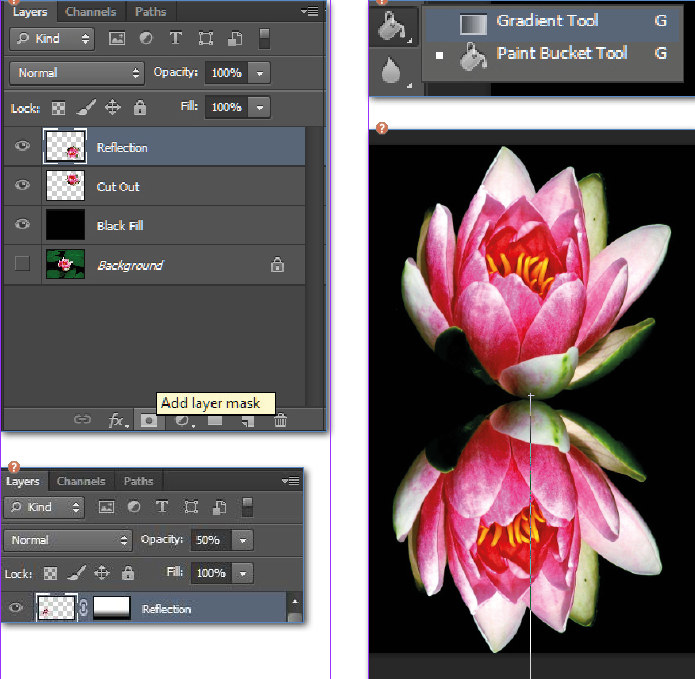
Step 7: In the Adobe Photoshop Layers panel, click the icon at the bottom that says “Add layer mask” when you hover over it. Press G to activate the Paint Bucket Tool. Right click the Paint Bucket Tool icon and select the Adobe Photoshop Gradient Tool. Starting at the bottom of the original image, hold Shift (to make a straight line) and click-and-drag downward, past the bottom of the flipped image. This will cause the flipped image to gradually fade. Lower the Opacity of the Reflection layer to 50%.
And here you have it in a few simple steps a stunning reflection effect in Adobe Photoshop!
If you’d like to learn more about Adobe Photoshop, Adobe InDesign or Adobe Illustrator, why not check out our Upcoming Adobe Training Courses?
Even if you can’t make it to us in-person, you can take advantage of our Online Adobe Training Courses, currently on offer for less than half price, and all of which including lifetime access to all of our in-depth video tutorials.
Please browse our site – we know we’ve got the right package for you – and use our Contact Page to reach out.

 Click here to see all of our Software Training Courses
This is very nice post. It is also very helpful for us. I have been searching types of posts. Some days ago I read an article about post. But this better than post.
Services
• Photoshop Clipping Path Service
• Neck joint s invisible mannequin service
• 360° products images editing
• Photoshop shadow service
• Raster to Vector (R2V) Conversion
• Advertising Design
• multiple clipping path or color mask service
• Photoshop Image Masking Service
• Remove The Backgrounds
• photoshop color correction service
• Photo retouching service
• Photo restoration service
• Isolating image service
• photoshop cutout service
• I Image cleaning photo dust removal service
• clipping mask illustrator
• Photoshop Image manipulation services
• Photo cropping /Resizing service
• Image Editing Service
• Photoshop layer mask service.