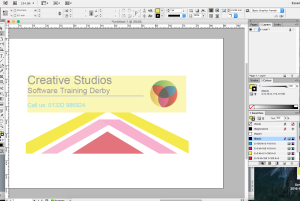
InDesign is one of the best programs for creating a business card.
Since your reading this article you are obviously curious about the program or just want to start learning the basics, this blog will show you shortcuts, helper tools, shapes and how to start using the pen tool, but if you want more then take up one of our courses here with Creative Studios hosted by the professionals.
With InDesign you can personalise your Business’ brand. By utilising the colours your business already uses, a brand is developed.
With InDesign it’s easy to create, export and print your cards.
Here’s a step-by-step guide on creating your business card.
Open up InDesign
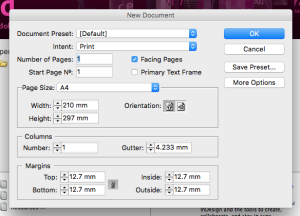
When opening InDesign a box will appear asking the document type. Click on document, this will then open another box for you to personalise your document in terms of width, height, pixels etc.
For a business card the size you would be looking at would be 55mm by 85mm. Press the dropdown menu as shown below and type the numerical values as mentioned.
Check the dropdown box is set for Print and you’re ready to go.
Shape Tool
Check your tools palette that runs vertically on the left hand side of the window. This consists of the T symbol for text which we will be talking more about later as well as the pen tool.
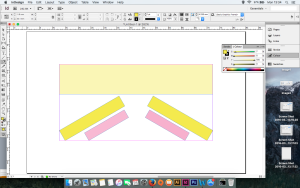
First pick a shape, (the keyboard shortcut for this is M), the surface shape is usually a rectangle but you can reveal hidden tools underneath by long pressing the mouse button, this displays a list of all the hidden tools underneath the specified tool.
By holding down the ALT button, this will constrain your shapes’ proportions, therefore allowing you the creation of a square shape.
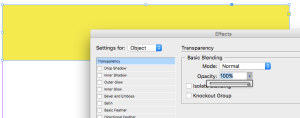
If you want to tone down the colour one option is to change the Opacity or Transparency of your shape. To do this simply select the shape by clicking on the bounding box (blue outer lines) and right clicking. The drop down menu has an option named Effects containing Transparency. By clicking on this you can now lower the colours’ fill by dragging the arrow to the desired point.
Pen Tool for Shapes
Anchor Points
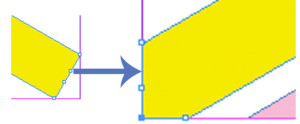
These are the little dots that appear on a shape when either the pen tool is selected or the direct selection tool (which is located at the top of the tools panel).
By clicking one of the anchors with the direct selection tool, you can manipulate the shape to best suit. Just click on a point and drag.
Drawing with the Pen Tool
Click anywhere on the document, if you click anywhere else again, the pen tool follows a path to the second point you created. This is how to draw a straight line and shapes. When closing a shape the mouse cursor symbol will change and a circle will appear. This is denoting the closed ending of a shape.
Curving the Pen Tool
This is where the process gets a little trickier. When creating an anchor point you will need to hold down the mouse button and drag the Handle either up or down depending where you want your curved line to be.
When you are satisfied with the handle, click somewhere else on the document, this then creates a curved line.
Getting the hang of the pen tool takes time and practice so you may think about taking a course.
Filling Shapes with Colour
Locate the colour palette on the right hand side of the window, or when the shape is selected you can locate the colour options on the menu bar at the top of the screen.
 You may notice two boxes. The top box selects what colour your fill to be and the bottom box denotes the stroke colour (the outline of your shapes colour).
The stroke and colour can be set to none by selecting the small arrow and locating the white box with the red line diagonally crossing it, see above.
These can also be found at the bottom of your tools palette and can adjust the colour accordingly.
Adding Text
Locate the text option by clicking the T symbol on the tools palette. When the cursor icon turns to a boxed T, this denotes a text box can be created.
You can also either click anywhere in the document to start typing.
By navigating to the top of the panel for colours as done before, you can again change the stroke or fill. If in a bounding box, you can add effects such as shadowing, transparency etc.
It’s a tool to play around with and experiment until you’re happy with what you’re getting.
To export your document simply click file – export and choose the format. Its also an idea to keep a copy of the original by doing a normal save as. This is so you can come back to it at any point if re-branding your company.
So there are my simple tips for making a business card in Indesign. It takes time and dedication so a course maybe right for you. Here at creative studios we have some great courses to suit your needs, either online or on site taught by the professionals. To contact us simply phone 01332 986924 or email: info@creativestudiosderby.co.uk

 Click here to see all of our Software Training Courses
