One of InDesign’s most useful features for creating all manner of documents – be they PDFs, brochures, eBooks, pamphlets or what have you – is the ability to place multiple images at once in a grid frame that is automatically created to your specifications.
And the best news is that it is very simple to do.
In this blog we’ll walk you through step-by-step exactly how to place as many images as you like in InDesign, all arranged neatly in a grid with the frames filled proportionally.
Sound good? Cool – let’s get down to it.
How to Place Images in a Grid in InDesign
First up, open a new document.
If you’re going to be loading up a number of images from Adobe Photoshop or Illustrator, then at this point I recommend opening up the Mini Bridge window for Adobe Bridge.
This, indeed, is good practice – Adobe Bridge is the creative link between InDesign, Photoshop and Illustrator. It allows you to essentially use all three applications as one. All the photographs that you create with Photoshop and all the graphics you create with Illustrator are all readily accessible right in Adobe Bridge, and when you want to bring them altogether in an InDesign document, then by far the easiest way to do that is to launch the Mini Bridge window.
Just go to Window > Mini Bridge, and it will automatically pop open.

Next up, select the images that you want to use. Do this in Mini Bridge by holding down cmd and clicking each image that you want, then right click on any image and select Place in InDesign.
If not using Mini Bridge, then just go to File > Place, and select the images that you want to use from your files and then click Open.
Dragging out Your Grid
You will see that your cursor will now be loaded up with images – one image will display, and the number of images you’ve selected shown.
Now you need to drag out your grid.
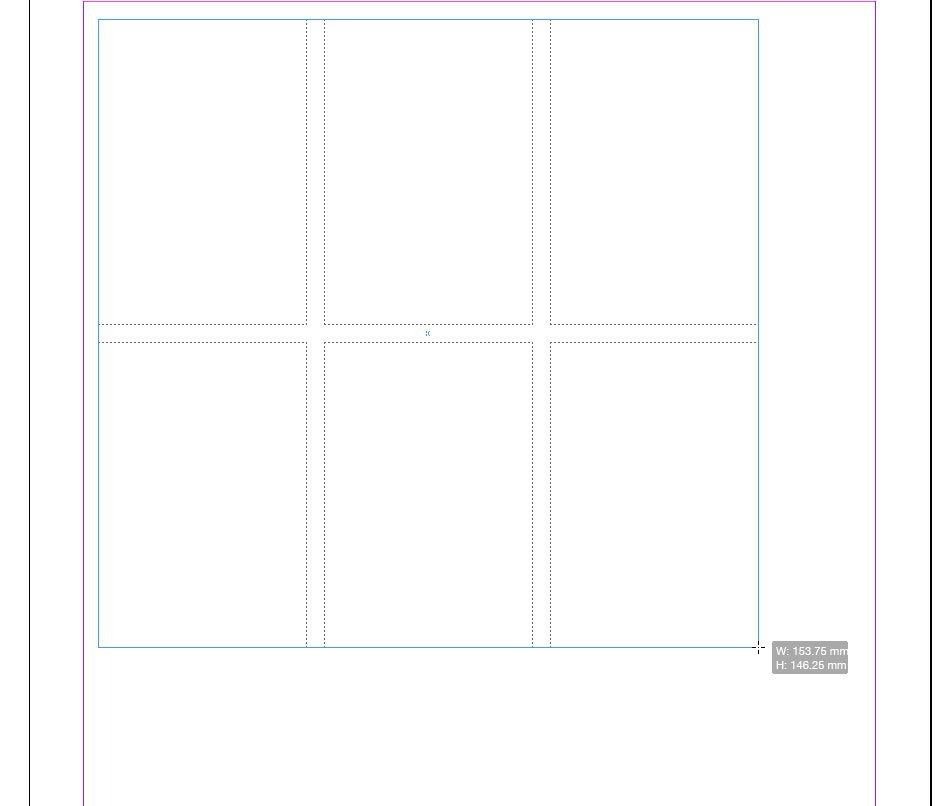
Hold down the left mouse button and drag out the grid. Then, still holding down the mouse button, use your arrow keys to create frames in your grid. The up and down arrows split your grid horizontally, and the left and right split it vertically.

You can also change the size of the gaps in between the frames. Again, still holding down the mouse button, this time hold the control key and use the arrow buttons to make the gaps larger or smaller as you see fit.
In the image above I made six frames, but I just want four for the document I’m creating.
So, I dragged out a grid, split it once horizontally and once vertically, then, as I let go of the mouse button, all four of my images slot into separate frames automatically, leaving me with this:

Filling Frame Proportionally
You will probably find that your images don’t fit inside the frames perfectly. I’ve chosen nice square photos to go into my nice square frames – but the frames aren’t perfect squares, and, as you can see, the images don’t quite fill them perfectly.
The solution is very simple.
All I need to do, whilst all the frames are selected as one, is click the Fill Frame Proportionally button, which is located in the top tool bar here:

Alternatively, you can go to Object > Fitting > Fill Frame Proportionally.
When you click this, your images will automatically rescale themselves so that they fill the frames proportionally:

And there you have it – placing multiple images in a grid is as simple as that.
Remember, you can put as many frames as you want in a grid, and load up as many images all at once.
In case you still need some guidance, then check out our walkthrough video of the process.
Want to learn more InDesign wizardry? Sign up for one of our InDesign Training Courses today and get taught one-on-one by an experienced industry professional.
Alternatively, you can sign up today for one of our streamlined and affordable Online Training Courses, and get immediate access to a whole catalogue of tutorial videos that we have created ourselves and update regularly. Hope to see you either online or in the classroom soon!
<a href="https://creativestudios.thinkific.com/courses/indesign-essentials" target="_blank" rel="noopener">50% OFF WITH CODE 'CSBLOG'</a>
