Adobe Photoshop is one of those programs that will take even the most dedicated photographic digital artist a whole lifetime to master. It’s a massive piece of software – so big, in fact, that I’m sure even the developers don’t know the whole way around.
I’ve been using Adobe products for the best part of 8 years, and I’m still learning new things each time I fire one up.
And for me, that’s the beauty and excitement of learning something like Photoshop – you never stop learning.
However, I’m very well aware that for the complete novice, the whole stress of just getting started with the program can be enough to be put people off forever. And I do have some sympathy – I once decided that I was going to learn the guitar. It looks simple enough, right?
Well, I have to say that on my first go I just didn’t get what I was supposed to do with the thing at all. On the second, I tried all day to play a D major chord (I think), but those darn strings just wouldn’t chime with each other like they’re supposed to. I was always muting one or the other or putting my fingers on the wrong fret, and each time I strummed it sounded more like I was beating a drum than strumming a guitar.
On the third day my fingers still hurt from the day before. I tried once more to play that chord. I failed.
On the fourth day, the guitar was back on eBay.
That must have been 5 years ago. And, as I sit here and write this, I’m wondering what would have happened if I had just persisted. If I had plugged away until I’d nailed that sodding D chord. And then learnt the G chord. Then the A, B, C, and the whole darn alphabet. 5 years later I expect I would now be shredding Foo Fighters, Rolling Stones, Radiohead and Nirvana with the best of them.
But I didn’t. I quit at the first hurdle.
I think you get my point.
Photoshop is difficult to begin with. It all seems very confusing, and even completing the simplest D major chord of tasks – like just uploading a photograph onto the screen (just go to File > Open and select the file) – can seem too tricky to even bother with.
But, my advice – borne from my own hard-earned wisdom – is to persist. Get over the first couple of hurdles, train your brain and your fingers to adjust to this new instrument, and, once you’ve learned the first couple of chords, the rest become a lot easier.
So, let me now walk you through getting started on Photoshop. Stick with it – you’ll thank me in five years’ time.
5 Quick Tips To Get You started With Photoshop
There are a few things that most beginners both want to be able to do on Photoshop, and also tend to get stuck with. These are the first hurdles to get over. Consider them the D, C, E minor, G and A chords of Photoshop, which, as I am reliably informed by my musician brother, if you can master will enable you play dozens of well-known songs with confidence.
I believe him, for indeed, if you master these five basic Photoshop tips you’ll find the whole world of photographic manipulation open up before you… And all it takes from there is a little persistence and practice.
1. Removing Blemishes
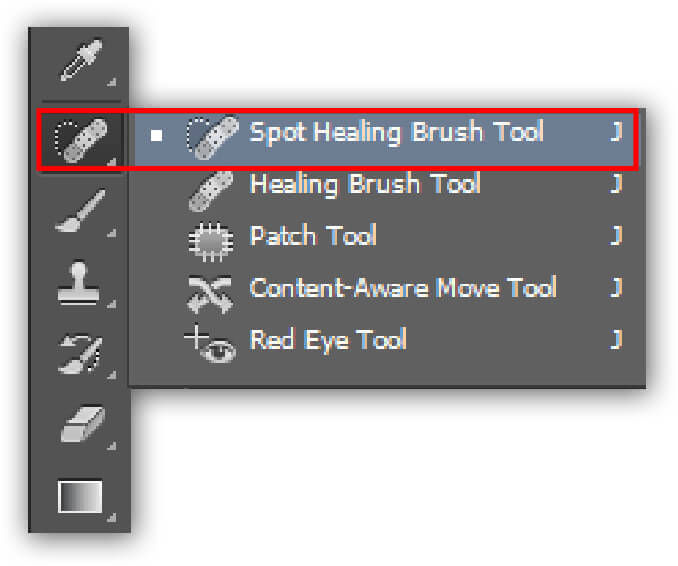
I can’t stress enough what a powerful program Photoshop really is. It’s seriously cool, as you will quickly learn by playing around with the Spot Healing Brush Tool.
Here’s what it looks like and where to find it:

Over the years, Adobe have refined and refined the intelligence of this tool so that now it couldn’t be simpler to use, nor indeed any better in its effect. Once you’ve loaded up your image and have noticed a couple of blemishes that you’d rather were not there – perhaps you’ve done a self-portrait and are unhappy about a pimple on your nose, or you’ve taken a picture of a beautiful landscape, but you didn’t notice that man in the red coat up on the cliff when you took the shot – all you do is select the Spot Healing Brush Tool and click (and drag if need be) on the blemish that you want removed and let go of the mouse button.
Photoshop intelligently recognises the blemish you’re trying to get rid of, and matches the colour and tone to the surrounding area, removing the blemish instantly. The pimple disappears. The man in the red coat must fallen off the cliff, because there’s nothing but blue sky where he once was. It really is that simple.
2. Removing Red Eye
Taken a photo of someone and they’ve ended up with demonic red eyes? No problem.
You’ll see in the screenshot above where to find the Red Eye Tool. Simply select it, and then click and drag a box around the affected eye. Release, and the red eye will be removed. Repeat for other red eyes in the photo.
3. Cropping An Image
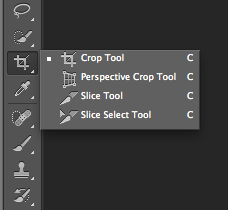
Cropping is the term used when you want to cut out a portion of the image, for instance to scale it down to bring the focus of a scene onto a specific area.
To do so, find the crop tool in the left hand tool bar.

Now, click and drag out a box that you want to crop out. Once you’ve drawn this box you can adjust its size by clicking on its corners and sides and dragging it out. Once you’re happy, right click on the inside of the crop and select Crop. All done.
4. Moving An Object
Blemishes are one thing – but moving whole objects?
Yes, this is completely doable with Photoshop, and you will end up with very professional results.
Sometimes, you may be concerned about the composition of your photograph. Let’s say, for instance, that you’ve taken a photo of a single boat in a harbour. You though it was perfect when you snapped, but now looking at it on the screen you realise that the whole photograph would look better if you moved the boat an inch or so to the left.
Yes, this can be done.
What you need to select is the object that you want to move. The best way to do this is select the Lasso Tool from the tool bar, and use it draw around the object that you want to move. In the below example, it’s the hiker in the foreground. You can draw around the object very crudely – don’t worry about getting too close to the outline.

Once you’ve got the object encircled and selected, next find the Content Aware Move Tool in the tool panel. Now all you need to do is click and drag the object from where it was to where you want it to be. Once you let go of the mouse, Photoshop will automatically reconstruct the area where the image was previously.

(Image source: helpx.adobe.com)
It’s incredibly powerful, and incredibly simple to use.
5. How To Add Text To Your Images
Super easy this one!.
Simply select the Type Tool from the tool bar, and then either just click at the point on the image where you want to type, or draw out a text box and begin typing in that.
You’ll see at the top of the screen you can adjust the font and the size and the colour of the type. It’s very simple, and will get you going nicely.
Master these tips and you will have a strong basic command of Photoshop, from which you can continue to hone your skills.
Perhaps what I should have done five years ago was take up some proper guitar lessons rather than trying to fudge my way through – and to be honest, if you really want to start mastering Photoshop, then you’re going to need some lessons, too.
Book up on one of our Photoshop Training Courses today, and you’ll soon be manipulating photos as expertly as Jimi played the blues!
